The Anatomy of a Backyard Fire Hazard
Electricity is a lazy, homicidal force. It is always looking for the shortest path to ground, and it does not care if that path is through your shed’s framing or your own nervous system. After 35 years of being a forensic inspector, I’ve seen my share of ‘DIY miracles’ that were actually just slow-motion arson. When people start planning their 2026 shed projects—whether it is a home office, a workshop, or a spot for energy storage systems—they focus on the flooring and the windows. They treat the electrical wiring services as an afterthought, a weekend task involving a shovel and some cheap cable. That is how you end up calling a 24 hour emergency electrician at 3:00 AM because your backyard is glowing.
My journeyman used to smack my hand with a pair of dikes if I even looked at a wire the wrong way while stripping it. ‘You nick that copper, kid, and you’ve just built a heater, not a circuit,’ he’d scream. He was right. That tiny notch in the conductor reduces the cross-sectional area, creating a localized point of high resistance. In a shed, where temperature swings are brutal, that ‘hot spot’ expands and contracts until the connection fails or the insulation ignites. If you are prepping for a 2026 install, you need to understand the physics of what you are burying in the dirt.
“The grounding electrode conductor shall be copper, aluminum, or copper-clad aluminum and shall be solid or stranded, insulated, covered, or bare.” – NEC Section 250.62
Mistake 1: The ‘Widow Maker’ Trench and Burial Depth
I’ve walked onto job sites where the homeowner buried Romex three inches under the sod. They think because it is in a piece of grey PVC, it is safe. It’s not. In the electrical trade, we call a shallow, unprotected line a ‘Widow Maker.’ Why? Because the first time you or a future homeowner decides to edge the lawn or install landscape lighting install, that spade is going right through the conduit. For 2026, don’t be cheap. If you aren’t using rigid metal conduit, you need to be at least 18 inches down for PVC. If you’re just burying direct-bury UF cable, you better hit 24 inches. We use Monkey Shit (duct seal) at the ends of the conduit to keep the moisture out, but the depth is your primary defense against physical damage. If you hit a line while digging, you aren’t just losing power; you’re potentially energizing the very soil you’re standing on.
Mistake 2: Ignoring Voltage Drop and the ‘Skinny Wire’ Syndrome
People try to run a 100-foot home run to a shed using 14-gauge wire because it’s cheaper. Then they wonder why their table saw bogs down or their home theater wiring produces a flickering image. This is Ohm’s Law in action. Resistance is a function of length and diameter. The longer the run, the more voltage you lose to heat. If you start with 120 volts at the meter socket replacement and lose 10% by the time it reaches the shed, your motors are going to run hot and die young. For a shed in 2026, especially if you’re planning for high-draw items like a bathroom exhaust fan or power tools, you need to calculate for a maximum 3% voltage drop. This often means ‘upsizing’ your conductors to #10 or even #8 copper. It’s about the physics of electron flow; don’t try to push a fire hose worth of current through a soda straw.
Mistake 3: The ‘Floating Neutral’ and Poor Grounding
This is where the forensic inspector in me gets nervous. A shed is a separate structure. You cannot just ‘borrow’ a ground from a nearby circuit. You need a dedicated grounding electrode install—usually an eight-foot copper-clad rod driven into the earth at the shed site. I’ve seen ‘handyman specials’ where they bonded the neutral and ground in the shed’s subpanel. That is a violation of code and a recipe for disaster. It creates a parallel path for return current, meaning your shed’s metal siding could become ‘live’ under the right fault conditions. If you’re unsure about how to isolate your neutrals, you should read more on how electricians tackle troubleshooting for lighting installations to understand the complexity of modern circuitry.
“Aluminum wire connections can overheat and cause a fire without tripping the circuit breaker.” – CPSC Safety Alert 516
Mistake 4: Using Indoor Materials in a ‘Damp’ Environment
Just because a shed has a roof doesn’t mean it’s a ‘dry’ location. Condensation is the silent killer of electrical components. I’ve opened smart thermostat wiring boxes in sheds that were filled with green corrosion because the installer used standard indoor wire nuts and non-gasketed covers. For 2026, every rough-in should use THWN-2 wire in conduit, which is rated for wet locations. Standard Romex has paper filler that acts like a wick; once moisture gets in, it travels up the wire, rotting the copper from the inside out. This is particularly dangerous if you are planning to integrate lighting installations that require constant power. Always use weather-rated boxes and ensure your trim-out includes GFCI protection for every single outlet. No exceptions.
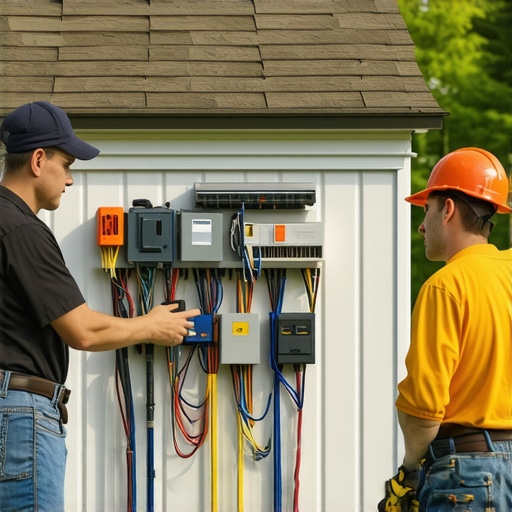
Mistake 5: Overloading the Existing Service
Before you add a shed, you have to look at your main panel. If you have an old house with knob and tube removal still on the to-do list, or a 100-amp service that is already screaming, you can’t just slap a 60-amp subpanel on top of it. I’ve seen meter socket replacement jobs where the lugs were melted because the homeowner added a shed with a heater and an AC unit without doing a load calculation. If you’re planning for a modern shed with energy storage systems or high-end electronics, you might need a service ‘heavy-up.’ Use your tick tracer to check for phantom loads before you start. If you’re adding significant load, you’re better off consulting a pro via our contact page than risking a localized blackout.
The Final Torque
Electricity doesn’t give second chances. When I do a forensic inspection after a fire, I’m looking for the ‘smoking gun’—usually a loose terminal screw or a nicked wire. When you finish your shed wiring, don’t just ‘snug’ the screws. Use a torque screwdriver to hit the manufacturer’s specs. If it’s too loose, you get arcing; if it’s too tight, you crush the conductor and create a weak point. Whether you’re doing smart thermostat wiring or a full panel install, precision is the difference between a functional workspace and a pile of ash. Take your time, follow the NEC, and treat every wire like it’s a loaded gun. Because it is.