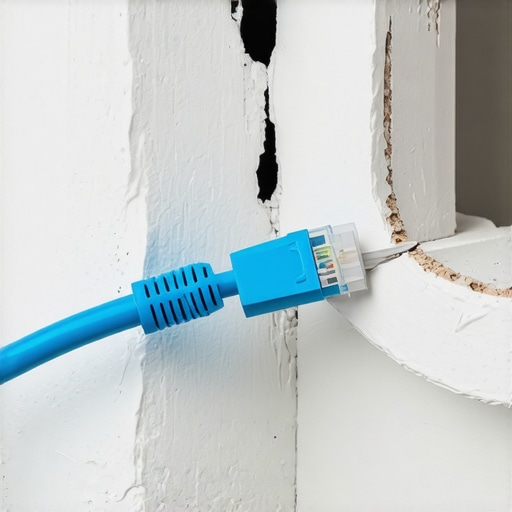
You smell it before you see it. That sharp, ozone-tinged scent of scorched PVC. I’ve seen homeowners try to save a buck by fishing CAT6 through the same three-quarter-inch hole as an over-fused 120-volt kitchen circuit. They think they’re being efficient; I see a structural fire waiting for an invitation. When you’re running data cables through existing walls, you aren’t just ‘pulling wire.’ You’re navigating a minefield of thermal dynamics, electromagnetic interference (EMI), and structural fireblocks that haven’t been disturbed since the Nixon administration. My journeyman used to smack my hand if I stripped a wire with a pocket knife. ‘You nick the copper, you create a hot spot,’ he’d scream. He was right. That microscopic notch creates a point of high resistance, focusing heat until the insulation carbonizes. If you’re fishing data lines near old 1970s aluminum wiring, you’re playing with a specific kind of physics called Cold Creep. Aluminum expands and contracts at a much higher rate than copper. Every time a load hits those old circuits, the wire deforms. If you shove a stiff data cable against an already loose aluminum terminal, you’ve just invited a house fire to dinner.
“Aluminum wire connections can overheat and cause a fire without tripping the circuit breaker.” – CPSC Safety Alert 516
Before you even reach for your fish tape, you need to understand the ‘Autopsy’ of a failed installation. Most DIYers think a wall is a hollow void. In reality, it’s a labyrinth of fire-blocking 2x4s, plumbing vents, and haphazardly stapled Romex. If you’re working in a mid-century home (1960–1980), you likely have a Federal Pacific or Zinsco panel. These are the ‘Widow Makers’ of the industry. The breakers jam, the bus bars corrode, and when you’re fishing a data line and accidentally nick a wire, those breakers won’t trip. They’ll just sit there and cook while you’re holding the other end of the cable. This is why a ‘Tick Tracer’—a non-contact voltage tester—is your best friend, though we old-timers still reach for the ‘Wiggy’ to get a real solenoid-driven reading. If your home is still running on an antiquated service, you’re likely due for an electrical panel upgrade before you start adding smart-home infrastructure.The professional process begins with the ‘Rough-in’ mindset, even if the walls are already closed. You don’t just drill; you scout. We use a magnetic tracer to find the path of least resistance. You’re looking for the ‘Home Run’—the direct path back to the network closet or rack. When you encounter a horizontal fireblock, you don’t just bash through it. You use a long-shaft flex bit with a guide tool to maintain the integrity of the stud. One of the biggest mistakes I see is a lack of separation. NEC Article 800 is very clear about the ‘two-inch rule.’ Data cables and power cables shouldn’t share the same hole or junction box without a permanent barrier.
“Communications wires and cables shall have a vertical clearance of not less than 2.44 m (8 ft) from all points of roofs above which they pass.” – NFPA 70 (National Electrical Code)
Why does this matter? Induction. When AC current flows through a wire, it creates a fluctuating magnetic field. If your CAT6 is zip-tied to a power line, that magnetic field ‘induces’ a voltage onto your data line. This creates ‘noise’ that kills your bandwidth. You might have gigabit fiber coming into the house, but if your data run is choked by EMI from a poorly placed chandelier installation or a nearby kitchen circuit, you’re wasting your money. If you’re building out a true high-tech space, consider how ensuring safe and efficient EV charging station setup at home requires similar dedicated pathways to avoid interference with residential data streams.Then there is the issue of grounding. People think data is ‘low voltage’ and therefore safe. Tell that to the guy who gets hit by a surge because his network rack wasn’t bonded to the house’s grounding electrode install. If you’re adding heavy loads like a level 2 EV charger or planning a solar panel electrical hookup, your entire grounding system needs to be evaluated. A bad ground doesn’t just fry electronics; it creates a ‘floating neutral’ situation that can put 240 volts through your 120-volt devices. When we do a meter base replacement, we aren’t just swapping a box; we’re ensuring the entire reference point for your home’s electricity is stable.Once the path is cleared, the ‘Trim-out’ phase requires precision. Use ‘Dikes’ to clean up your ends, but never over-tighten your staples or zip ties. Crushing the jacket of a data cable changes the ‘twist rate’ of the internal pairs, which is what provides the noise cancellation. It’s the same level of care needed for troubleshooting for lighting installations—precision over speed. If you’re running lines for up lighting services or parking lot lighting, you’ll be using ‘Monkey Shit’ (duct seal) to plug the conduits. Inside the house, we use fire-rated caulk. If you poke a hole in a fire-rated assembly (like the ceiling of a garage), you must restore that rating. Don’t be the guy who lets a garage fire spread to the bedrooms because of a sloppy data pull. Financing electrical upgrades is often the best route for homeowners to do this right rather than cutting corners. Whether it’s a microgrid integration or a simple CAT6 run, the physics remains the same: heat is the enemy, and Code is the only thing keeping the lights on. Sleep at night knowing your connections are torqued to spec and your pathways are clear. {“@context”: “https://schema.org”, “@type”: “HowTo”, “name”: “Professional Data Cable Installation in Existing Walls”, “step”: [{“@type”: “HowToStep”, “text”: “Map the path using a magnetic tracer to identify studs and fireblocks.”}, {“@type”: “HowToStep”, “text”: “Verify the absence of live power lines using a NCVT or Wiggy to avoid ‘Widow Maker’ scenarios.”}, {“@type”: “HowToStep”, “text”: “Drill access holes using a flex-bit, ensuring at least 2 inches of separation from existing power lines to prevent induction.”}, {“@type”: “HowToStep”, “text”: “Fish the CAT6 cable using glow rods or fish tape, maintaining minimal tension to avoid jacket deformation.”}, {“@type”: “HowToStep”, “text”: “Seal all penetrations with fire-rated caulk or duct seal to maintain fire-blocking integrity.”}]}