
The Backyard Death Trap: A Forensic Introduction
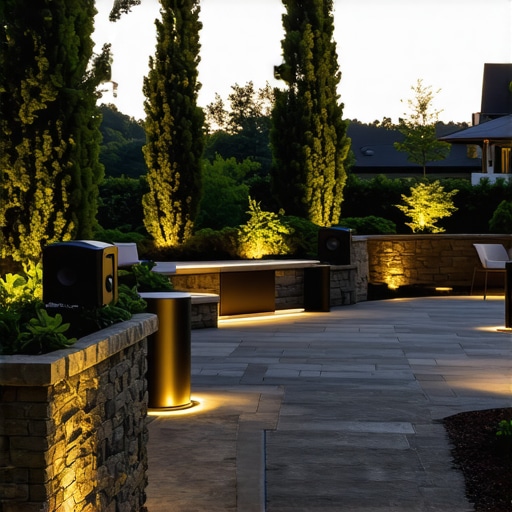
I walked into a ‘fully renovated’ outdoor entertainment space last summer that looked like a million bucks on the surface. The client called because the music cut out every time the patio heater kicked on. I pulled out my tick tracer and started scanning the stone masonry. The flipper had buried live junction boxes behind three inches of stacked stone with no access, and even worse, they’d used indoor-rated wire for the ‘up lighting services’. I found the fault where the moisture had turned the wire nuts into a corroded, green mess that was literally boiling the groundwater. This wasn’t just a repair; it was a forensic recovery mission. Most people think backyard wiring is just about digging a hole and dropping some Romex in the dirt. Those people usually end up calling me when their expensive sound system starts smoking or, god forbid, someone gets a ‘tingle’ from the wet grass. Real professional-grade sound and light requires more than a shovel; it requires an understanding of the 1960s-era infrastructure that likely feeds your home.
The Mid-Century Problem: Why Your Panel is a Time Bomb
If your home was built between 1960 and 1980, your dreams of a professional-grade backyard might be dead on arrival without an electrical panel upgrade. During this era, panels like Federal Pacific Electric (FPE) and Zinsco were the industry standard. The problem? The physics of their bus bars. FPE ‘Stab-Lok’ breakers are notorious for jamming. They won’t trip even when the wire is literally melting off the lug. When you add a heavy load like high-output lighting and a 2000-watt outdoor amplifier, you are inviting a catastrophic failure. Aluminum wiring was also common then, and it suffers from ‘Cold Creep’—the metal expands and contracts at a different rate than the brass screws on your outlets. This loosening creates high-resistance heat. You can’t just slap a new breaker in a 40-year-old panel and call it a day. We often look at financing electrical upgrades because a safe foundation is the only way to support a modern outdoor load without burning the house down from the inside out.
“Aluminum wire connections can overheat and cause a fire without tripping the circuit breaker.” – CPSC Safety Alert 516
The Physics of the ‘Home Run’: Voltage Drop and Ohm’s Law
When we talk about ‘Rough-in’ for a backyard, we aren’t just pulling wire. We are calculating the ‘Home Run’ distance. If your panel is on the north side of the house and your outdoor kitchen is 150 feet away in the south corner of the yard, you’re dealing with massive voltage drop. If you use standard 14-gauge wire, that 120 volts at the breaker might be 105 volts by the time it reaches your amplifiers. Low voltage causes motors to run hot and electronics to fail prematurely. For professional-grade sound, I insist on 10-gauge or even 8-gauge copper for long runs to ensure we maintain the integrity of the signal. This is why electrical wiring services shouldn’t be handled by a guy with a truck and a pair of dikes. You need to understand the resistance of the conductor over distance.
Burial Depths and the ‘Monkey Shit’ Defense
The NEC is very specific about how deep you bury your mistakes. If you’re using PVC conduit (Schedule 40), you’re looking at an 18-inch trench. If you’re going with Rigid Metal Conduit (RMC), you can get away with 6 inches, but it’s a nightmare to work with. I’ve seen too many DIYers use UF cable (Direct Burial) and only scratch the surface. One pass with a sharp spade during spring planting and you’ve got a dead short. When we transition from the underground conduit to the recessed lighting installation or the speaker mounts, we use ‘Monkey Shit’—that’s industry talk for duct seal. It’s a gray, putty-like substance that prevents moisture and ants from entering the conduit system. Without it, the temperature fluctuations between the warm house and the cold ground will pull condensation into your pipes, eventually rotting the wire insulation from the inside out.
Sound and Light: Grounding is Not Optional
When you’re installing high-end audio near water features or pools, spa grounding services become the most critical part of the job. It’s not just about the equipment; it’s about the ‘Equipotential Bonding Grid’. We need to ensure that every metal component—from the speaker housing to the pool ladder—is at the same electrical potential. If there’s a difference, you become the path to ground. This is especially true when we integrate kitchen range hood wiring for outdoor grills. If that hood isn’t bonded correctly to the rest of the system, a simple outlet switch repair won’t save you from a nasty shock when you touch the grill and the prep table at the same time.
“All 15- and 20-ampere, single-phase, 125-volt receptacles located in outdoors shall have ground-fault circuit-interrupter protection for personnel.” – NEC Section 210.8(A)(3)
The Anatomy of a Professional Outdoor Circuit
A pro-grade setup doesn’t piggyback off the garage lights. It gets its own dedicated circuits. We start with a surge protector installation at the main panel to protect the sensitive boards in your outdoor LED controllers and Sonos amps. From there, we run a ‘Wiggy’ test to verify the neutral-to-ground integrity. For larger estates, we might even look at three phase power services if the load for pool heat pumps and massive lighting arrays demands it. Every outdoor outlet must be a WR-rated (Weather Resistant) GFCI, housed in an ‘extra-duty’ in-use cover. If I see a standard indoor outlet outside, I’m already looking for the rest of the shortcuts that ‘handyman’ took. For those looking to do this right, reading a lighting installations made easy guide can help you understand the basics, but the heavy lifting should be left to someone who knows how to use a megohmmeter.
The Forensic Inspection of Outdoor Lighting
When I’m called for up lighting services, I’m looking at the ‘Trim-out’ quality. Are the fixtures made of cheap plastic or solid brass? Plastic expands and cracks in the sun, letting in the rain. Once water hits a hot halogen or even a high-wattage LED, the thermal shock can shatter the housing. I’ve seen ‘flickering’ lights that were actually small arcs jumping across corroded pins in the fixture. This is why we use dielectric grease on every single connection. It’s a non-conductive silicone grease that seals out the oxygen and moisture. If you don’t use it, you’re just counting down the days until the oxidation layer builds up enough resistance to kill the circuit. For more complex setups, how electricians tackle troubleshooting for lighting installations provides a deeper dive into the diagnostic process we use to find those hidden faults.
Conclusion: Sleep Better When It’s Torqued to Spec
Electricity is lazy; it always wants to find the easiest path to the ground. In your backyard, that path shouldn’t be through you, your kids, or your expensive outdoor sound system. Whether it’s a simple outlet switch repair or a massive backyard overhaul, the principles remain the same: tight connections, proper burial depths, and a panel that can actually handle the load. Don’t let a flipper’s shortcuts turn your backyard oasis into a forensic crime scene. Do the math, respect Ohm’s Law, and for heaven’s sake, stop using indoor extension cords for your patio lights. If you’re unsure about your home’s capacity, contact us to get a real professional to look at your service. It’s much cheaper to do it right once than to pay me to find where the wire is melting behind your expensive new stone wall. Your backyard should be a place of relaxation, not a ‘Widow Maker’ waiting for the first rain of the season.”, “image”: {“imagePrompt”: “A professional electrician in a dusty crawlspace inspecting a corroded Federal Pacific electrical panel with a flashlight, showing charred bus bars and old wiring, realistic forensic style.”, “imageTitle”: “Forensic Inspection of a Faulty Electrical Panel”, “imageAlt”: “Master electrician inspecting a dangerous old electrical panel with signs of arcing and heat damage.”}, “categoryId”: 0, “postTime”: “”}