The Dark Truth Beneath the Fiberglass
You think running a bit of data cable is a weekend hobby? Tell that to the guy whose house smelled like melting fish because he zip-tied his CAT6 to a hot 240V circuit feeding an old air conditioner. Most people look at an attic and see storage space; I see a structural minefield of thermal hazards, brittle insulation, and EMF interference that will turn your gigabit speed into a dial-up crawl. When we talk about The Right Way to Run CAT6 Cable Through Existing Attic Spaces, we aren’t just talking about getting a signal from point A to point B. We are talking about maintaining the integrity of the fire-rated assembly and ensuring your low-voltage ‘convenience’ doesn’t become the ignition source for a five-alarm headache.
My journeyman used to smack my hand if I stripped a wire with a knife. ‘You nick the copper, you create a hot spot,’ he’d scream. He was right. Even with 23AWG CAT6, a tiny score on that conductor increases resistance. When you start pushing Power over Ethernet (PoE) for a doorbell camera install or a high-end wireless access point, that resistance generates heat. Multiply that by 48 ports in a rack, and you’ve got a real problem. Electricity is lazy but it’s also violent if you give it a path it wasn’t meant to take.
The Physics of Interference: Why Proximity Kills Performance
The biggest mistake DIYers and ‘handymen’ make is lack of separation. They see a nice, straight run of 12/2 Romex and think it’s a perfect guide for their CAT6. Wrong. You’re inviting Electromagnetic Interference (EMI). When AC current flows through that copper, it creates a magnetic field. Because CAT6 relies on precise differential signaling, that 60Hz hum from your home rewiring services or attic fan installation lines will induce a voltage into your data pairs. This results in packet loss, retries, and a ‘slow’ internet that no router reboot can fix.
“Class 2, Class 3, and PLTC circuits shall be installed in a neat and workmanlike manner. Cables and conductors installed exposed on the surface of ceilings and sidewalls shall be supported by the building structure in such a manner that the cable will not be damaged by normal building use.” – NEC 725.24
To do it right, you need to maintain at least 6 to 12 inches of clearance from power lines. If you must cross them, do it at a 90-degree angle. This minimizes the surface area where the cables are parallel, reducing the ‘coupling’ effect. I’ve seen lighting installation services ruined because someone ran the data lines for the smart controller right on top of the transformer installation for the pathway lighting install. The result? Flickering lights and a crashed network.
Mid-Century Hazards: Aluminum and the ‘Cold Creep’
If your home was built between 1960 and 1980, you’re likely dealing with a mid-century infrastructure that wasn’t designed for the heat loads of modern living. This is where I find the ‘Time Bombs.’ You go into the attic to pull a home run of CAT6 and find old aluminum wiring. Aluminum has a high coefficient of thermal expansion. It undergoes ‘Cold Creep’—expanding and contracting until the wire literally wiggles itself out of the terminal. If you’re bumping into these wires while dragging a cable snake, you’re playing Operation with a high-voltage fuse. This is why storm damage electrical repair often reveals that the ‘storm’ was just the final push for a loose aluminum connection to arc out.
When we perform home rewiring services, we look for these failures. If you see a junction box that looks charred or feels warm to the touch, stop the CAT6 run and call a pro. That heat isn’t just ‘old house charm’; it’s an active arc fault. Integrating a surge protector installation at the panel is non-negotiable here. A single transient spike from a failing attic fan installation can travel right through your network switch and fry every connected device in the house.
The Forensic Breakdown of a Proper Pull
First, you need the right tools. Put away the kitchen steak knife. You need a dedicated pair of dikes, a tick tracer (non-contact voltage tester) to ensure you aren’t grabbing a live wire in the dark, and a Wiggy if you really need to test for phantom voltage. Before you start the rough-in, map your path. Avoid the eaves where moisture collects. Salt air in coastal regions or simple condensation in the Midwest will corrode the copper pinouts in your keystones faster than you think. This is why we use ‘Monkey Shit’ (duct seal) to plug the holes where cables transition from the attic into the wall cavity. It prevents the chimney effect, where hot attic air is sucked into your conditioned living space.
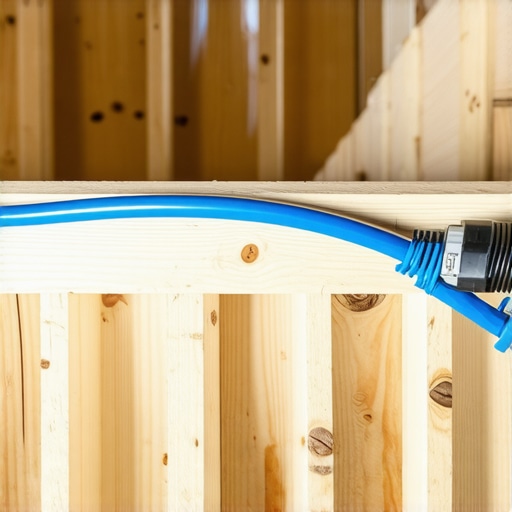
Support your cables. Don’t drape them over the joists like wet laundry. Use J-hooks. They provide a wide base that maintains the bend radius. If you kink a CAT6 cable, you change the distance between the twisted pairs inside the jacket. This creates Crosstalk. You’ve just turned your CAT6 into CAT3. If you’re doing a doorbell camera install, ensure the exterior penetration is shielded and dripped-looped. Water follows wire; don’t let it lead right into your $500 smart lock.
“Aluminum wire connections can overheat and cause a fire without tripping the circuit breaker.” – CPSC Safety Alert 516
The NEC code updates are clear about emergency exit lighting and low-voltage pathways: they must be secured. A loose cable in an attic is a trip hazard for the next guy—likely me—crawling through there to fix a storm damage electrical repair. I’ve seen cables caught in the blades of an attic fan because some ‘handyman’ thought gravity was enough of a fastener. Use plenum-rated cable (CMP) if your attic serves as an air return. Standard PVC jacketed cable (CMX) releases toxic hydrochloric acid gas when it burns. In a fire, it’s not the flames that get you; it’s the two breaths of plastic smoke.
The Component Zoom: Cold Creep and Joule Heating
Let’s talk about the physics of why we don’t bunch cables. Joule Heating occurs when current passes through a conductor, producing heat. In a single CAT6 cable, it’s negligible. But when you bundle 24 cables together in a tight wrap of zip ties—which I call ‘constriction loops’—the cables in the center of the bundle have no way to dissipate heat. This is especially critical with high-wattage PoE++ (Type 4) used for modern lighting installation services. The NEC code updates now have specific tables for ‘bundle size vs. ampacity’ for a reason. If those cables get too hot, the insulation softens, the twists migrate, and your signal-to-noise ratio hits the floor.
When you’re finishing the trim-out, use a proper 110-punchdown tool. Don’t use a flathead screwdriver to jam wires into the IDC (Insulation Displacement Connector) terminals. You’ll stretch the metal and create a high-resistance bridge. For those of you looking into ev charger troubleshooting, you’ll know that every connection point is a potential failure. The same logic applies to your transformer installation for outdoor lights. Clean, tight, and torqued. If you aren’t sure if your home’s backbone can handle the upgrade, check out optimal performance tips for system-wide health.
Closing the Circuit
Electricity doesn’t care about your Netflix stream; it only cares about finding the path of least resistance to ground. Whether you are doing a doorbell camera install, setting up emergency exit lighting, or just trying to get better Wi-Fi in the garage, the rules of the NEC are written in blood and ashes. Don’t be the guy whose forensic report I have to write. If the crawl space is too tight, if the wiring looks like a bird’s nest of 1970s aluminum, or if you see Zinsco or Federal Pacific markings on your panel, stop. You are no longer in ‘DIY’ territory. You are in a ‘Life and Safety’ zone. Secure your home rewiring services and get it done right so you can sleep at night knowing your connections are torqued and your attic isn’t a tinderbox. For professional help with your infrastructure, you can always contact us to ensure your home is up to code.