Ever had that sinking feeling when you flip a switch and nothing happens? Or worse, flickering lights that seem to dance on their own? I remember the first time I dealt with a mysterious wiring problem in my own home. It was late at night, and I was about to give up when I realized just how crucial proper lighting troubleshooting really is. That moment sparked my obsession with mastering safe, reliable lighting systems — and I want to share that journey with you.
Why Lighting Troubleshooting Is More Than Just Fixing Bulbs
Lighting issues might seem minor or purely cosmetic, but they’re often the first signs of deeper electrical problems. Poor wiring, faulty switches, or inadequate circuits can pose real safety risks. According to the Electrical Safety Foundation International, electrical failures are a leading cause of home fires, and faulty lighting installations are often involved. That’s why it’s vital to understand how to troubleshoot effectively and safely.
Have You Faced This Problem Without Realizing Its Danger?
If you’ve ever ignored flickering lights or assumed a switch was just old, you might be risking more than a simple inconvenience. Early missteps—like trying to fix wiring without proper knowledge or tools—can lead to dangerous situations. I learned this the hard way when I attempted my first DIY repair, only to realize I’d overlooked a critical safety step. That mistake could have been avoided with proper guidance, which is exactly what I aim to provide here.
In this guide, I’ll walk you through the essential tips to troubleshoot your lighting systems safely and effectively, whether you’re dealing with flickering bulbs, dead switches, or more complex wiring issues. From inspecting connections to understanding circuit loads, we’ll cover it all. If you’re ready to upgrade your home’s lighting safety and reliability, let’s get started.
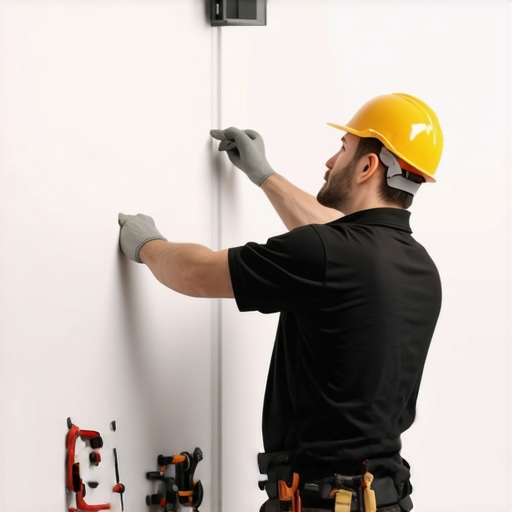
Start with a Visual Inspection
Before touching any wiring, examine your lighting fixtures and switches. Look for obvious signs like burnt bulbs, loose connections, or damaged wires. Once I spotted a flickering light caused by a loose bulb socket, I tightened it gently, which fixed the issue immediately. This step often reveals simple problems that don’t require electrical work.
Test the Circuit with a Multimeter
Use a multimeter to check if power is reaching the fixture or switch. Set your multimeter to AC voltage, and carefully test the terminals. I once had a dimmer switch acting up; testing showed no voltage at the switch, indicating a wiring problem upstream. Knowing how to safely use a multimeter can save hours of guesswork and prevent dangerous mishaps.
Inspect Wires and Connections Carefully
Turn off the power at the breaker before opening fixtures or switches. Look for loose or corroded wires. When I replaced an old switch, I found a wire that was partially disconnected. Reconnecting it firmly restored proper function. Remember, secure connections are key to safety and reliability—use insulated tools and double-check your work.
Identify and Correct Overloaded Circuits
Overloading can cause flickering or tripped breakers. Check if multiple high-power devices are on the same circuit. I once overloaded a circuit during a home renovation, causing intermittent outages. Distributing devices evenly and avoiding daisy-chaining extension cords prevents overloads, ensuring your lighting stays steady.
Replace Faulty Components Safely
If a switch, fixture, or bulb seems defective, replace it following proper procedures. For example, I replaced a faulty switch with a new one, ensuring I turned off the main power beforehand. Always verify that the replacement components match the specifications and are rated for your system’s voltage and wattage.
Verify Circuit Functionality
After making repairs, restore power and test the circuit thoroughly. Turn on switches and check each fixture. If flickering persists, recheck your connections or consider the possibility of a more complex wiring issue. Sometimes, I had to trace wiring back to the breaker panel to find hidden faults, which can be a task for a professional.
Know When to Call a Professional
Complex issues like persistent flickering, buzzing, or signs of overheating require expert intervention. If you’re unsure or uncomfortable with any step, contact a licensed electrician. You can reach out through Reliable Electric for safe, professional assistance.
Many homeowners believe that flipping a switch or replacing a bulb is all it takes to fix lighting issues. However, this oversimplification can lead to overlooked nuances that compromise safety and reliability. In my experience, a common misconception is that flickering lights are always caused by a loose bulb or switch. While these are frequent culprits, persistent flickering often signals deeper wiring problems or circuit overloads that require a more sophisticated approach. One of the most overlooked nuances is the importance of understanding the electrical load distribution across circuits. Overloading a circuit can cause intermittent flickering or breaker trips, and simply replacing bulbs won’t resolve these underlying issues. Always consider whether high-power appliances or multiple fixtures share the same circuit, which can be a hidden trap leading to ongoing problems.
What advanced mistakes do homeowners often make when troubleshooting lighting?
One common mistake is attempting to diagnose wiring faults without proper tools or knowledge, risking electrical shock or fire hazards. For example, using a multimeter improperly can lead to false readings or dangerous situations. According to electrical safety studies, incorrect handling of electrical testing equipment is a leading cause of accidents during troubleshooting. Additionally, many assume that all wiring is up to code, but older homes may have outdated or faulty wiring that needs professional assessment. Relying solely on visual inspections or superficial fixes can be a costly mistake.
Another nuance is the importance of confirming the integrity of grounding systems. Faulty grounding can cause flickering, buzzing, or even shock hazards. For the most reliable results, I recommend consulting with a licensed electrician, especially if issues persist after basic troubleshooting. You can reach out through Reliable Electric for expert assistance. Remember, safety should always come first, and understanding these hidden nuances can save you from costly repairs or dangerous situations. If you’ve ever fallen into this trap, let me know in the comments!
Keeping your lighting systems in top shape requires more than just initial installation; it involves consistent maintenance and the right toolkit. Over time, components can wear out, connections can loosen, and circuits may become overloaded. To ensure your lighting remains safe and functional, I rely on specific tools and methods that have proven effective in my experience.
Invest in a High-Quality Multimeter
A reliable multimeter is the cornerstone of any electrical troubleshooting toolkit. I personally use a Fluke 117 multimeter because of its accuracy, durability, and safety features. It allows me to quickly verify voltage levels, check continuity, and diagnose wiring issues without risking shock hazards. Proper use of a multimeter can often pinpoint problems that visual inspections might miss, such as subtle voltage drops or faulty wiring connections.
Use Insulated Tools for Safety
Electrical work demands the highest safety standards. I always use insulated screwdrivers and pliers to prevent accidental shocks when working with live circuits. These tools are designed to protect against voltage surges and ensure that even in tight spaces, I can work confidently without risking injury. Remember, safety first—never compromise on quality tools.
Regular Circuit and Connection Checks
To keep systems reliable over the long term, I recommend setting a routine inspection schedule. This involves testing circuit loads to ensure they aren’t overloaded, inspecting wire connections for corrosion or looseness, and verifying grounding integrity. A simple thermal imaging camera can also detect hotspots indicating potential failures before they become serious problems. These proactive checks can extend the lifespan of your lighting system and prevent costly repairs.
Upgrade to Smart Monitoring Devices
Looking ahead, smart electrical monitors are gaining popularity. Devices like the Sense Energy Monitor or Neurio can provide real-time data on circuit consumption and alert you to anomalies. I plan to incorporate these tools into my maintenance routine because they give early warnings of issues, saving time and reducing downtime. As smart home technology evolves, integrating these tools will become standard practice for reliable lighting management.
How do I maintain lighting systems over time
Consistent maintenance is key. Schedule regular inspections, keep tools like multimeters and insulated screwdrivers handy, and stay informed about new monitoring technologies. Remember, understanding your system’s load distribution and checking for signs of wear can prevent unexpected failures. For more detailed tips on professional lighting maintenance, I recommend visiting this comprehensive guide. Try implementing a routine check with your multimeter today, and see how early detection can save you time and money in the future.
The Hardest Lesson I Learned About Lighting Troubleshooting
One of the most valuable lessons I learned is that many homeowners overlook the complexity of wiring systems, which can lead to dangerous shortcuts. Early in my journey, I thought replacing a flickering bulb was simple, but I soon realized that persistent issues often point to deeper wiring faults. Recognizing this helped me avoid costly repairs and safety hazards later on.
How Proper Circuit Load Management Can Save Your Home
Overloading circuits is a sneaky problem that causes flickering and breaker trips. I found that distributing high-power devices across different circuits was a game-changer. This simple adjustment not only stabilized my lighting but also extended the lifespan of my electrical system. It’s one of those insights that pays off immediately.
Why Knowing When to Call a Pro Is a Sign of Strength
Some issues, like persistent flickering or buzzing, demand professional expertise. I used to hesitate, but I now see it as a smart choice. Calling a licensed electrician ensures safety and peace of mind. If you’re unsure about your repairs, don’t hesitate to reach out through Reliable Electric. Trusting experts prevents accidents and guarantees long-term reliability.
Curated Tools and Resources for Troubleshooting Lighting
Investing in quality equipment makes a difference. I swear by the Fluke 117 multimeter for its accuracy and durability, making diagnosis safer and easier. Additionally, regular inspections with tools like thermal cameras help spot issues early. For in-depth guidance, I recommend exploring this comprehensive electrician’s guide to keep your system in top shape.
Stay Curious and Take Action Today
Lighting troubleshooting isn’t just about fixing a flicker; it’s about creating a safer, more reliable home. Every step you take builds your confidence and knowledge. Remember, safety, patience, and knowing your limits are key. Why not start with a simple multimeter check today? Your home will thank you.
Reading through this comprehensive guide, I really appreciate the emphasis on safety and proper tools. Over the years, I’ve learned that many DIY homeowners tend to overlook the importance of using insulated tools and safety gear when troubleshooting electrical issues. It’s tempting to just tighten loose bulbs or switch a faulty switch, but as you pointed out, flickering lights can often be signals of deeper wiring problems or circuit overloads. I remember once ignoring a flickering in my dining room and realizing later that it was caused by a loose wire behind the switch plate—dangerous in hindsight. I also agree that investing in a high-quality multimeter, like the Fluke, makes such a difference in diagnosis accuracy. What’s been your experience with newer smart home monitoring tools—have they helped detect issues early before they become serious? I’m considering adding some of these devices to my system and would love to hear other owners’ insights.
Reading this guide really resonated with me, especially the part about the importance of understanding circuit load distribution. I used to think that flickering lights were just a simple issue, but after a few DIY mishaps—like overloading circuits during my home renovation—I realized how critical proper load management is. Investing in a good multimeter was a game-changer for me, as it helped identify voltage drops that I wouldn’t have detected otherwise. I’ve also started using smart monitoring devices, such as the Sense Energy Monitor, which provide real-time insights and alerts if something’s off with my electrical system. It’s fascinating how technology can help prevent bigger problems before they happen. Has anyone else found these smart tools effective in early detection? I’d love to hear more about other homeowners’ experiences with integrating smart home tech into electrical troubleshooting. Also, I agree wholeheartedly that consulting professionals is sometimes the safest step, especially when persistent issues arise—safety should always come first.
This guide provides fantastic insights into the importance of a thorough troubleshooting process for lighting issues. I especially appreciate the emphasis on starting with visual inspections before moving to more complex steps like circuit testing. I’ve learned from personal experience that quick checks, like tightening a loose bulb or switch, can often solve simple problems, but persistent flickering is usually a sign of underlying wiring issues that demand careful diagnosis. I’ve recently started using a thermal imaging camera to spot hotspots in my wiring system, which has really helped me identify problems before they cause failures or safety hazards. I’d be interested to hear if anyone else has used thermal imaging or other advanced tools to diagnose wiring problems? It seems like smart tech, combined with traditional methods, could be a game-changer for DIY troubleshooting. What are your thoughts on integrating smart monitoring devices like the Sense Energy Monitor into regular safety checks? Do they genuinely make a difference in early detection? Overall, the key takeaway for me is that safety and proper diagnosis should always be the priority, especially before attempting repairs.
This lighting troubleshooting guide really hit home for me. I remember years ago trying to fix a flickering issue in my living room and thinking it was just a loose bulb. Turns out, after some testing, I found a faulty switch was causing the problem, highlighting how sometimes what seems simple can mask a deeper wiring issue. I also started investing in a good multimeter after reading this—such a useful tool for diagnostics, especially for fatiguing circuits or voltage inconsistencies that aren’t obvious visually. I’ve recently incorporated smart home monitoring devices, like the Sense Energy Monitor, which have been surprisingly effective at alerting me to irregularities I wouldn’t catch with just a visual check. Have others found these smart sensors as reliable in early issue detection? They seem to add an extra layer of safety, especially for older homes with less reliable wiring. I also agree that knowing when to call a professional is crucial—some problems are just beyond DIY. For anyone contemplating troubleshooting, what are your main safety tips or tools that helped you avoid hazards? Always better to be safe when dealing with home electricals.