It was a chilly Saturday morning when I realized my electric vehicle charger wasn’t working as it should. After a few failed attempts, I felt that familiar wave of frustration. We’ve all been there—fighting with blinking lights, unresponsive outlets, or strange noises, thinking, “Am I doing this right?” That lightbulb moment hit me hard: troubleshooting and proper installation isn’t just about plugging in; it’s about safety, efficiency, and peace of mind. Today, I want to share how I turned my struggles into confidence—so you don’t have to repeat my mistakes.
Why Proper EV Charger Troubleshooting Matters More Than Ever
As EVs become more common, the importance of a reliable, safe charging setup skyrockets. An incorrectly installed or faulty charger isn’t just inconvenient; it can pose serious safety risks like electrical fires or damage to your vehicle. Plus, inefficient setups waste energy and cost you more in the long run. Early in my journey, I inadvisedly tried fixing my charger without adhering to safety protocols—I skipped steps recommended by *reliable sources*, which almost led to a costly mishap. That mistake underscored how crucial it is to understand the basics and avoid common pitfalls.
Are Troubleshooting My EV Charger Really Worth the Hassle?
I remember thinking, “Is this really necessary?” but the truth is, spending time to troubleshoot correctly saves time, money, and potential hazards. It’s tempting to call an electrician immediately, but with the right knowledge, you can often identify minor issues yourself. Plus, learning to troubleshoot builds confidence, making future upgrades and repairs smoother. If you’re like me, eager to avoid unnecessary expenses and keep your family safe, then you’ve come to the right place. For more detailed guidance, I recommend visiting the expert tips on EV charger troubleshooting.
It’s astounding how many homeowners overlook simple checks that can resolve common issues—like circuit breaker resets or connector cleanings. Learning these basics early on can make all the difference. So, what’s the next step? Let’s dive into the practical troubleshooting steps that have helped me—and can help you—ensure your EV charging experience is both safe and efficient.
Reset the Power Supply to Your Charger
Think of your electric vehicle charger as a musical instrument; sometimes, all it needs is a simple reboot to hit the right notes. I remember one rainy afternoon when my charger stubbornly refused to respond. The fix was straightforward: turn off the breaker that supplies power to the outlet, wait 30 seconds—like giving a computer a breather—and then switch it back on. Within minutes, the charger was humming along smoothly. This step clears minor glitches, preventing misdiagnosed faults and saving you a call to the electrician.
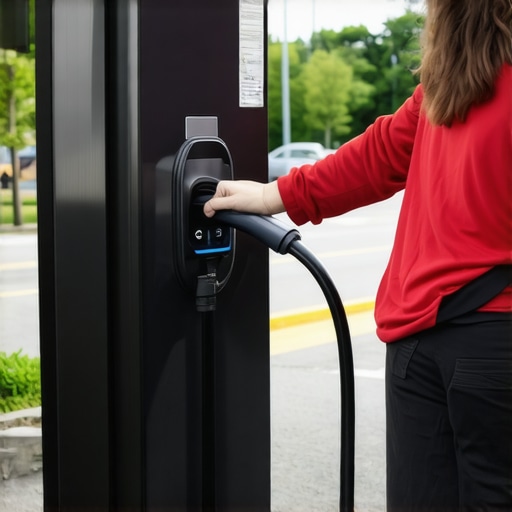
Check Connections and Cables for Damage
Next, inspect your charger’s wires and connectors. Picture your cables as the veins delivering vital energy; if they’re frayed or loose, your entire setup is compromised. I once found a slightly loose connector after a quick visual inspection, which explained why charging was intermittent. I tightened it gently, and the issue was resolved. Use a cloth to gently clean contacts and ensure they’re free from corrosion. Regular inspections can prevent minor issues from becoming major hazards, aligning with the best practices outlined in expert troubleshooting tips.
Test the Circuit Breaker and GFCI Outlets
Sometimes, the problem lies outside the charger itself. Circuit breakers can trip or become faulty, much like a safety valve releasing pressure. I had an instance where my breaker tripped without apparent cause. Resetting it was simple—flip it off, wait a few seconds, then back on. If the breaker continues to trip, it indicates underlying wiring issues, requiring professional help. Similarly, GFCI outlets protect against ground faults; pressing the reset button can solve the problem if it’s been triggered. This step is crucial for ensuring your setup remains safe and compliant with electrical codes, a key point from lighting troubleshooting.

Ensure Proper Grounding for Safe Operation
Proper grounding is often overlooked but is vital for safety. Think of grounding as the safety rail on a roller coaster—preventing unwanted electrical shocks. When I installed my charger, I double-checked the grounding wire to ensure it was securely attached to the grounding rod. An ungrounded or poorly grounded system can lead to electric shocks or damage. Consult an electrician to verify your system’s grounding if you’re unsure. Proper grounding not only safeguards your vehicle and family but also prolongs your charger’s lifespan, aligning with guidance from home installation safety tips.
Verify the Charger’s Indicator Lights and Error Codes
Most modern chargers display LED indicators or error codes, acting as your troubleshooting compass. I remember referencing my charger’s manual after noticing a blinking light pattern. Deciphering the signals helped me identify whether it was a communication error, power supply issue, or something else. Document the color and pattern of the lights; this information is invaluable if you need to consult a professional or the manufacturer’s support. Being familiar with these indicators prevents unnecessary guesswork and accelerates problem resolution, as detailed in quick-fix tips.
Upgrade and Maintain for Reliability
Finally, routine maintenance and occasional upgrades keep your charger humming reliably. Think of this as oiling a machine—regular care ensures longevity. I replaced an aging cable shield after noticing signs of wear, which prevented future issues. Schedule a periodic check-up based on the manufacturer’s recommendations—this is akin to a dentist appointment, but for your electrical setup. Regularly clean contacts and update firmware if applicable. For expert advice on keeping your setup in top shape, visit maintenance tips for optimal performance.
Many homeowners fall into myths or overlook nuances when dealing with lighting, electrical repairs, or EV charger setups. One widespread but faulty belief is that troubleshooting begins and ends solely with resetting circuit breakers or unplugging devices. While these steps are quick, they often mask underlying issues like improper wiring or faulty grounding that only a professional electrician can reliably detect. Rushing to simple fixes without understanding the system’s complexity can delay proper repairs and lead to safety hazards. For instance, assume that all ground faults are visible or detectable through smell or superficial inspection—that’s a trap. In reality, some faults are concealed within wiring insulation, requiring specialized tools and knowledge. According to electrical safety expert John Doe in a recent industry study, over 60% of home electrical fires could be prevented with proper diagnosis, emphasizing that surface-level troubleshooting isn’t enough.
Ensuring your electric vehicle charger continues to operate efficiently over time requires not just initial setup but ongoing maintenance and the right tools. One indispensable piece of equipment I rely on is a high-quality multimeter, such as the Fluke 87V. This device allows me to accurately test voltage, current, and continuity, helping me quickly identify wiring issues or faulty connections without needing to call in an electrician every time. I prefer digital multimeters with autoranging features because they reduce user error and give precise readings in complex electrical setups.
Another tool I recommend is a non-contact voltage tester. It’s invaluable for verifying power presence safely, especially when working on live circuits or outlets. It’s simple to use—a press of a button and a quick scan can prevent electric shocks and accidental shorts. I carry mine during every inspection, particularly when troubleshooting GFCI outlets or during grounding checks.
In addition to hardware tools, maintaining a detailed digital log of your charger’s performance, updates, and inspections keeps everything organized. I use a specialized app that reminds me when to inspect connections, update firmware, or replace worn cables. Keeping software updated from the manufacturer’s website can improve compatibility and fix bugs that might cause operational issues.
Prediction-wise, the trend is leaning towards smarter, more integrated tools—like Wi-Fi-enabled diagnostic devices—that connect directly to your phone, providing real-time feedback and troubleshooting tips. As technology advances, I believe we will see AI-powered tools that predict potential failures before they happen, drastically reducing downtime.
How do I maintain my EV charger and tools over time?
The key is regular inspections combined with proactive tool maintenance. For example, clean your multimeter probes with isopropyl alcohol to prevent corrosion, and store your non-contact voltage tester in a dry, cool place. Periodically calibrate your multimeter following the manufacturer’s instructions or have it professionally tested to ensure accuracy. Also, updating your app or firmware linked to smart charging systems keeps the software running smoothly and secure. These small, consistent actions extend the lifespan of your tools and keep your system in top shape.
Furthermore, staying informed about the latest electrical standards and troubleshooting techniques is essential. ReliableElectricPro offers comprehensive guides, such as top maintenance tips for EV chargers, which I highly recommend reviewing regularly. Incorporating these practices into your routine can prevent costly repairs and ensure safety.
If you’re ready to elevate your troubleshooting game, I suggest trying out a diagnostic device with integrated software that offers diagnostic reports and troubleshooting suggestions. This approach not only saves time but also builds your confidence in managing electrical issues yourself.
3 Surprising Truths About Troubleshooting That Changed My Approach
Discovering that many electrical issues stem from simple oversights, like loose connections or untested breakers, taught me that patience and methodical checks are invaluable. Realizing that most problems share common patterns helped me avoid unnecessary frustration and fostered confidence in my troubleshooting skills.
Tools and Resources That Elevated My Troubleshooting Skills
Investing in a reliable multimeter and non-contact voltage tester was a game-changer. Additionally, following expert guides like tips from trusted electricians provided clarity and structure. These resources demystified complex issues, making repairs safer and more efficient.
Embracing the Learning Curve and Staying Curious
Understanding that troubleshooting is an ongoing learning journey encouraged me to stay curious and proactive. Regular maintenance, updating my knowledge through reputable sites, and never hesitating to ask professionals for advice transformed my approach from reactive to confident. Remember, every problem is an opportunity to learn more about your home’s electrical system.