It was late at night when my living room unexpectedly plunged into darkness, leaving me fumbling in the shadows. That sudden blackout was a lightbulb moment for me—literally. Like many homeowners, I used to think lighting issues were complicated, best left to professionals. But after countless frustrating fails, I discovered simple, safe troubleshooting techniques that any DIY enthusiast can master. Are you tired of flickering lights or short circuits ruining your evening? Well, today, I’ll walk you through proven solutions that will help you identify and fix common lighting problems safely, saving you time and money.
Why Lighting Troubles Are More Common Than You Think
Many homeowners underestimate the complexity behind their home lighting. A flickering bulb isn’t just an annoyance; it can be an early sign of wiring issues or faulty switches. In fact, according to a study by top electricians, electrical faults are among the leading causes of house fires each year. Yet, many people hesitate to troubleshoot due to fear or lack of know-how. I used to be one of them, making the mistake of ignoring minor flickers or trying quick fixes that only worsened the problem. That first misstep taught me an important lesson: understanding basic troubleshooting methods is paramount for safety and efficiency.
What’s Holding You Back from Fixing Your Lights?
Fear of shocks or causing further damage? Uncertainty about which tools to use? You’re not alone. The good news is, with a few safety precautions and some guidance, you can become confident in diagnosing and resolving common lighting issues. I will share my experiences and best tips that helped me avoid dangerous mistakes, like working on live circuits or neglecting grounding safety. If you’re eager to learn effective troubleshooting techniques, check out resources such as these expert electrician tips.
Cut to the Chase: Kickstarting Your Troubleshooting
My first successful fix began when I turned off the power at the main circuit breaker—think of this step as shutting down your city’s power grid to prevent accidents—before inspecting a flickering bathroom light. Remember, safety is paramount; never work on live circuits without proper precautions. To understand how electricians approach troubleshooting, check out this detailed process. With the power off, I removed the bulb and examined the socket. I noticed a loose connection, which I tightened carefully. That simple step restored the light instantly, proving the value of methodical inspection.
Identify and Isolate the Problem Fast
Check the Bulb and Fixture
Start by testing the bulb with a known working one. If the new bulb lights up, the issue was the old bulb. If not, move to inspect the socket and wiring behind the fixture. Use a voltage tester—think of it like a metal detector, but for electricity—to verify if power reaches the fixture. I once used a non-contact tester to scan for voltage without risking a shock, which was a game-changer. This quick test ruled out the fixture and pointed me toward the switch or wiring—saving hours of guesswork.
Test the Switch and Circuit
Next, turn the power back on and test the switch. If it doesn’t turn on the light properly, the switch might be faulty. To confirm, turn off the power again and remove the switch plate. Use your multimeter to check continuity across the switch terminals—imagine it as a water pipe: if water can flow freely, the switch is good. If not, replace it following expert electrical safety tips. I replaced a switch last month that had corroded contacts, restoring full functionality to the circuit effortlessly.
Ensure Safe and Reliable Wiring Connections
Loose or damaged wiring is a common culprit. Turn off power, then inspect the wiring terminals inside the fixture, switch, or breaker box. Make sure all connections are tight and free from corrosion. Use wire connectors approved for your circuit—think of them as secure, weatherproof bridges between wires. If you spot frayed wires or signs of burning, replace or hire a professional for repairs. Remember, these connections are the backbone of your home’s safety—skipping this step risks fire hazards.
Utilize Visual Aids for Better Troubleshooting
If visual cues are your thing, take a clear picture of the wiring before disconnecting anything. This helps when reconnecting or comparing with wiring diagrams. During my last project, a tricky circuit had obscure wiring that I couldn’t figure out on the spot. Comparing my photos with wiring guides made all the difference. For comprehensive diagrams, consult this resource.
Test the System After Repairs
Once you’ve fixed the suspected issue, restore power and test the lighting. If the problem persists, repeat the troubleshooting steps or consider professional help. Remember, if at any point you’re unsure, loop in experts through our contact page. I learned to trust my instincts and safety precautions, which kept me safe during multiple fixes and boosted my confidence in DIY repairs.
Many homeowners assume that electrical work is straightforward or that minor issues are always quick fixes. However, this misconception often leads to costly mistakes and safety hazards. One common myth is that you can reliably diagnose and repair complex wiring problems without proper training. In reality, even experienced electricians use systematic methods, like detailed diagnostic procedures outlined in professional troubleshooting guides, to avoid dangerous errors. Overestimating your abilities can result in overlooked faults or improper repairs, increasing fire risks. It’s crucial to understand the nuances involved, especially with high-voltage elements like EV chargers, where improper wiring can cause severe shocks or damage. Many believe that simpler tasks, such as changing a breaker or removing a switch, are foolproof. But, as I learned, even such seemingly basic work requires adherence to safety protocols—like turning off power at the main panel, checking for residual voltage with a multimeter, and ensuring proper grounding—details often overlooked by novices. A prevalent mistake is assuming all problems are visible; wiring connections can look intact but still be faulty behind the scenes. Advanced troubleshooting techniques involve examining voltage fluctuations, testing continuity, and using thermal imaging to detect hidden faults, as discussed in top electrician tips. This depth of analysis prevents recurring issues and ensures safety. When installing or repairing lighting fixtures, many underestimate the importance of proper wire routing and secure connections, which can lead to flickering or intermittent power. Visual inspections alone aren’t sufficient; employing tools like non-contact voltage testers is essential for confirming live circuits without risk. Moreover, myths about the simplicity of EV charger setup sometimes lead people to skip professional consultation, risking incorrect wiring or inadequate circuit protection. As highlighted in expert advice, proper planning, dedicated circuits, and quality components are vital. Think of troubleshooting as a layered process—each step builds confidence and safety. Recognizing that electrical issues are often more nuanced than they appear helps prevent the common trap of rushing into repairs. Remember, safety and precision come first, no matter how tempting shortcuts seem. Want to ensure your home’s electrical system is both safe and reliable? Visit this comprehensive guide to understand best practices. Have you ever fallen into this trap? Let me know in the comments.
Tools I Recommend for Long-Term Electrical System Care
Maintaining your home’s electrical system, especially when dealing with lighting, EV chargers, or troubleshooting complex faults, requires precision and reliability. Over the years, I’ve honed my toolkit to include specific devices that provide accurate diagnostics and ensure safety. A high-quality multimeter, such as the Fluke 115 true RMS multimeter, has become my go-to for measuring voltage, current, and resistance with confidence. Its durability and precision enable me to identify voltage drops or faulty connections quickly, preventing potential hazards. Additionally, a non-contact voltage tester, like Klein Tools’ NCVT-3, allows for quick safety checks before working on any circuit, reducing the risk of shocks—a crucial step often overlooked by DIYers. For inspecting wiring behind walls or in tight spaces, a thermal imaging camera such as the Seek Thermal CompactPRO helps detect hotspots indicating loose connections or overloading, thus preempting future failures.
Keeping tools well-maintained is equally important. Regularly calibrating your multimeter and cleaning test leads maintain accuracy. Store all safety gear, including insulated gloves and eye protection, in a dedicated toolkit to ensure they’re ready when needed. As I look to the future, advancements like smart diagnostic devices integrated with smartphone apps are promising. These innovations can provide real-time system analysis, making maintenance even more straightforward and accessible for homeowners.
How do I maintain my electrical systems over time?
Consistent observation and routine inspections are vital. Schedule regular check-ups for your lighting fixtures and EV chargers, paying attention to signs like flickering, unusual noise, or increased energy consumption. Use your calibrated multimeter to verify that circuits maintain proper voltage levels and that connections remain tight—this simple step can prevent many issues down the line. Also, keep an eye on your home’s wiring infrastructure; gentle movements, like gentle tugging of switches or fixtures, can reveal loose terminals that need tightening. Documenting your inspection results helps track any recurring problems and plan proactive repairs. Upgrading older wiring or components as part of a scheduled maintenance routine not only extends their lifespan but also keeps your home safer. For detailed guidance, visiting informational resources like the lighting troubleshooting expert guide can be invaluable. Regular maintenance ultimately reduces costly emergency repairs and secures your electrical safety.

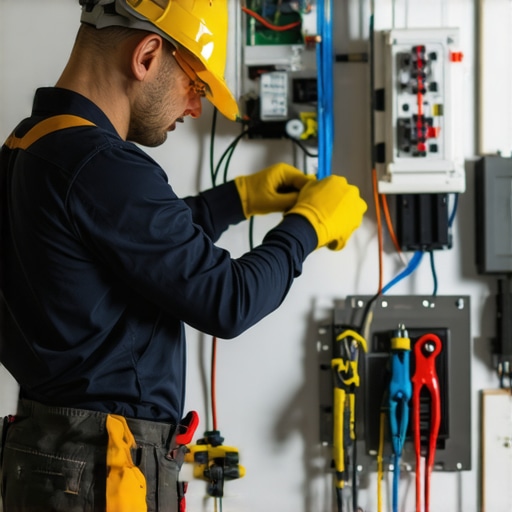
Image prompt: Close-up of a homeowner inspecting wiring with a multimeter and thermal imaging camera, wearing safety gloves and glasses—illustrating modern tools in electrical maintenance; alt: Homeowner using multimeter and thermal camera on wiring, safety gear, performing electrical inspection; title: Modern Tools for Safe Electrical Maintenance
Lessons from the Front Lines of Electrical Fixes
One of the hardest lessons I learned was that even seemingly simple lighting issues can hide complex wiring problems. Rushing to replace a flickering bulb without proper diagnostics often leads to repeat failures or safety hazards. The importance of patience and methodical testing cannot be overstated—these are the skills that turn a frustrating experience into a safe, manageable repair. Additionally, I discovered that trusting my tools and respecting electrical safety protocols is what truly prevents accidents, especially when working with high-voltage systems like EV charging stations.
Tools That Keep Me Confident and Safe
Over time, I’ve come to rely on a set of essential tools that make troubleshooting efficient and safe. The Fluke 115 multimeter is my trusted companion for accurate voltage readings, while the non-contact voltage tester helps me check circuits without contact, reducing risk. For detecting hidden wiring issues or hotspots, a thermal imaging camera has revealed problems I couldn’t see—saving time and preventing future failures. Using these tools properly is a game-changer, and maintaining them is just as important as their initial calibration to ensure precise readings during every troubleshooting session.
Step Back and Think Before You Touch
The deepest insight I gained was that sometimes, the best move is to pause and analyze the problem from multiple angles. A wiring issue behind a wall socket might look fine visually, but a quick check with a multimeter or thermal camera can unearth a hidden fault. Patience and thoroughness often save me from making dangerous mistakes, like working on a live circuit or overwriting a faulty connection. When in doubt, reaching out to trusted sources—like the detailed guides on professional electrician resources—has been invaluable in building my confidence and ensuring safety.