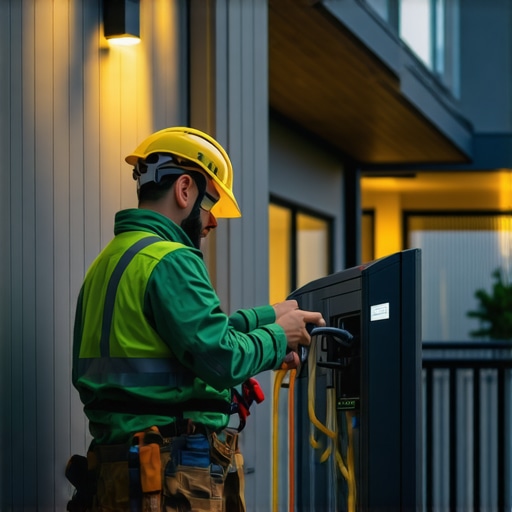
Ever experienced that sinking feeling when your new LED light flickers unpredictably or your EV charger refuses to start despite seemingly perfect setup? I’ve been there. I remember the first time I tried installing my own lighting fixture and ended up with a brief spark that made my heart skip a beat. That moment was a wake-up call. It made me realize how crucial proper troubleshooting and safety tips are—especially when dealing with high-voltage systems like lighting and EV chargers.
Why Proper Troubleshooting Matters More Than Ever
With the rise of smart homes and electric vehicles, our electrical systems are more complex and vital to our daily routines. A small mistake or oversight can lead to safety hazards, costly repairs, or worse. That’s why understanding essential troubleshooting techniques isn’t just for electricians—it’s for anyone who values their home’s safety and wants peace of mind.
Early on, I made a rookie mistake: assuming that simply resetting the breaker would fix everything. Turns out, that’s often just a temporary patch. A deeper issue might be lurking behind that flickering light or unresponsive charger. According to the Electrical Safety Foundation International, faulty wiring and improper installations are among the leading causes of electrical fires in homes. Proper troubleshooting can help prevent these dangers before they escalate.
Today, I’ll share some practical tips and insights to help you troubleshoot safely and effectively. Whether you’re dealing with dimming lights, flickering fixtures, or EV charger glitches, these strategies will guide you through diagnosing the problem without risking your safety.
Have you faced frustrating electrical issues that seemed impossible to fix on your own? If so, you’re not alone. Let’s dive into the steps that can help you troubleshoot like a pro and keep your home safe and powered up.
When your lighting flickers or your EV charger stalls, it’s easy to feel overwhelmed. Luckily, many common issues have straightforward solutions if you follow a systematic troubleshooting approach. Think of your electrical system like a chain — if one link is weak, the entire chain can break. Your goal is to identify that weak link without risking safety.
Start with the Basics and Isolate the Problem
First, turn off the affected device and unplug it. Check if other devices on the same circuit are working properly. For example, I once had a flickering kitchen light, and I noticed the living room outlets were fine. This told me the issue was isolated to that circuit or fixture. Always verify if the problem is localized or widespread before proceeding. This simple step prevents unnecessary work and helps narrow down the cause.
Inspect for Visible Damage and Loose Connections
Next, carefully examine the fixture or charger for obvious signs of damage—burn marks, loose wires, or corrosion. I once found a loose wire in a ceiling fixture that caused flickering. Tightening the connection fixed the issue instantly. Remember, always turn off the breaker before inspecting or touching wiring. For detailed guidance, check out how electricians troubleshoot lighting.
Test Circuit Breakers and Fuses
Sometimes, the problem lies in a tripped breaker or blown fuse. Reset the breaker fully—don’t just flip it back on. If it trips again, there might be an overload or fault. Replace blown fuses if present. Avoid resetting breakers repeatedly without understanding the cause, as this can be dangerous. If you’re unsure, consult an electrician or review troubleshooting electrical wiring and lighting safety.
Check Voltage Levels Carefully
Using a multimeter, measure voltage at the outlet or fixture. For lighting, you should see around 120V in North America or the standard voltage in your region. If voltage is low or fluctuating, this indicates a wiring or breaker issue. For EV chargers, ensure the circuit supplies the correct voltage as per the manufacturer’s specifications. Remember, working with high voltages can be dangerous; if you’re not confident, call a professional.
Test the Device or Component
If wiring seems intact, test the device itself. For example, I swapped out a faulty LED bulb with a new one to see if the flickering persisted. If the new bulb works fine, the original was defective. For EV chargers, follow expert tips on troubleshooting EV chargers to identify common hardware issues or software glitches.
Document Findings and Take Safety Precautions
Keep a record of what you’ve tested and observed. This helps if you need to consult a professional later. Always wear insulated gloves and use tools with insulated handles. Never work on live wiring unless you are qualified and equipped. When in doubt, contact a licensed electrician through our contact page.
When to Call a Professional
If troubleshooting doesn’t resolve the issue or if you detect damaged wiring, overheating, or persistent breaker trips, it’s time to seek expert help. Professionals can perform comprehensive diagnostics and ensure your system complies with safety standards. For safe setup and ongoing maintenance, review guidelines for safe EV charging station setup.

Many homeowners believe they can resolve complex electrical issues with just a basic understanding, but this can be a dangerous misconception. One of the most widespread myths is that flickering lights or unresponsive chargers are always caused by simple faults like loose bulbs or overloaded circuits. While these might be common causes, they often mask underlying problems that require a more nuanced approach. Relying solely on surface-level fixes can lead to safety hazards, including electrical fires or damage to expensive devices.
Let’s dig deeper into what most people overlook. A significant mistake is assuming that resetting the breaker is a permanent solution. In truth, frequent breaker trips indicate persistent issues such as faulty wiring, aging panels, or even hidden ground faults. According to experts, ignoring these signs can escalate minor problems into major safety risks. It’s essential to perform comprehensive diagnostics rather than just reset and forget.
Another common misconception is that all wiring problems are visible or easily detectable. However, many faults are hidden behind walls or within fixtures, making them hard to spot without specialized tools like multimeters or thermal cameras. For instance, an overheated connection might not show visible damage immediately but can still pose a fire risk. This is why understanding the nuances of electrical troubleshooting—such as testing for voltage drops or inspecting for subtle signs of wear—is crucial for advanced homeowners aiming for safety and reliability.
Why does voltage fluctuation continue even after fixing visible issues?
This question reveals a common oversight among DIYers. Voltage fluctuations can stem from issues like faulty service entrances, corroded connections, or problems with the utility supply itself. These are often beyond what simple troubleshooting can resolve and require professional intervention. Recognizing when to escalate the issue is vital; otherwise, you risk overlooking potentially dangerous faults. For more insights, check out expert electrician tips on advanced troubleshooting techniques.
Furthermore, many underestimate the importance of proper safety procedures. Working on live circuits without appropriate training or equipment can lead to severe injuries. Even seasoned DIY enthusiasts should know their limits and consult licensed electricians for complex issues. As the Electrical Safety Foundation International emphasizes, safety should always be the top priority—don’t treat troubleshooting as a DIY adventure without proper knowledge and precautions.
In summary, avoiding these misconceptions and understanding the deeper nuances of electrical troubleshooting can save you money, time, and most importantly, your safety. Have you ever fallen into this trap? Let me know in the comments.
Invest in Quality Multimeters for Precise Diagnostics
One of my go-to tools is a high-quality digital multimeter. I personally prefer the Fluke 117, because of its accuracy and durability. It allows me to quickly check voltage levels, continuity, and even detect subtle wiring faults that can cause flickering or charging issues. Reliable multimeters are essential for diagnosing problems without risking safety, especially when working with high voltages. In the future, I predict these devices will incorporate smarter features like Bluetooth connectivity for real-time data logging, making troubleshooting even more efficient.
Use Thermal Cameras to Spot Hidden Overheating
For more advanced diagnostics, I recommend a thermal camera like the FLIR C3. This tool helps me identify hot spots behind walls or within fixtures that are not visible to the naked eye. Overheating wiring or connections can be silent hazards leading to fires if left unchecked. Thermal imaging allows for non-invasive inspections and saves time in pinpointing issues early. As technology advances, I see thermal cameras becoming more affordable and integrated with smartphones, broadening their accessibility for DIY enthusiasts and professionals alike.
Maintain Your Tools for Long-Term Reliability
Proper maintenance is crucial. Always store your multimeter and thermal camera in a dry, padded case, and calibrate your multimeter regularly according to the manufacturer’s instructions. Using tools that are well-maintained ensures accurate readings over time and extends their lifespan. For example, I schedule quarterly calibration checks for my multimeter, which helps me trust the data I collect during troubleshooting sessions. Investing in high-quality, well-maintained tools reduces the risk of misdiagnosis and improves safety.
Keep a Troubleshooting Log for Consistent Results
Document every test, reading, and observation during troubleshooting. This habit helps identify recurring issues and patterns—like persistent voltage drops or overheating in certain circuits. Over time, this record becomes an invaluable resource for ongoing maintenance and when consulting with professionals. I keep a digital log on my tablet, which I update after each inspection. This systematic approach minimizes guesswork and ensures that no detail is overlooked, especially during complex repairs.
What Are the Best Practices for Long-Term Maintenance?
Regular inspection and proactive maintenance are key. Schedule annual checks for your electrical system, including testing circuit breakers, inspecting wiring, and cleaning fixtures. Use tools like multimeters to verify voltage stability and thermal cameras to catch hidden issues before they escalate. Following these practices can prevent costly repairs and safety hazards. For detailed guidance, see top maintenance tips for EV chargers.
Remember, while tools are vital, understanding how to interpret their data correctly is equally important. Take the time to learn your equipment thoroughly, and don’t hesitate to consult professional resources or experts when needed. Why not try out a thermal camera on your next inspection? It might just reveal a hidden issue lurking behind your walls.
After years of fixing electrical issues in my own home, I’ve learned that a few insider tips can make all the difference between a quick fix and a dangerous mistake. In this post, I want to share some deep lessons I’ve learned about troubleshooting lighting and EV chargers that you won’t find in generic guides.
The Hardest Lesson I Learned About Troubleshooting Home Electricals
One of my biggest revelations was realizing that repetitive breaker trips often hide serious wiring faults. Initially, I thought resetting the breaker was enough—big mistake. I eventually learned that persistent trips are a warning sign of underlying issues like ground faults or aging panels that demand professional attention. Recognizing these signs early can save lives and prevent costly repairs.
3 Myths About DIY Electrical Fixes That Held Me Back
A common misconception I had was that all flickering lights were caused by loose bulbs or overloaded circuits. Turns out, many flickering issues are symptoms of wiring degradation or faulty connections behind the wall. Believing these myths delayed my diagnosis and increased the risk of fire hazards. Learning to verify with proper tools like multimeters changed my approach entirely.
What Experts Won’t Tell You About Troubleshooting EV Chargers
One lightbulb moment was understanding that voltage fluctuations in EV chargers often indicate problems beyond the outlet—such as service entrance issues or corroded connections. Experts emphasize that diagnosing these faults requires careful voltage testing and sometimes thermal imaging to catch hidden overheating. Overlooking these steps can compromise safety and hardware longevity.
Curated Recommendations for Smarter Troubleshooting
My essential toolkit includes a trusted Fluke 117 multimeter for precise voltage readings and a FLIR C3 thermal camera to detect hot spots. I rely on these because they provide reliable data, helping me make informed decisions without risking safety. I also follow trusted guides like electrician troubleshooting techniques to refine my skills.
Harnessing the Power of Technology and Knowledge
Proper maintenance of tools is vital—regular calibration of my multimeter and careful storage ensure accurate diagnostics. Keeping a troubleshooting log helps me identify recurring issues and build a clear history of my home’s electrical health. These habits build confidence and safety over time.
Your Turn to Light the Way
Electrical troubleshooting isn’t just for professionals; with the right knowledge and tools, homeowners can confidently diagnose many issues. Remember, safety always comes first—know when to call in the experts. Are you ready to take your troubleshooting skills to the next level and ensure your home is safe and reliable? Share your experiences or questions below!
This post really hits home for me; I’ve had my fair share of electrical issues, especially with flickering lights and occasional EV charger hiccups. I completely agree that assuming a simple reset or replacement can sometimes mask deeper problems that could escalate into safety hazards if overlooked. I’ve found that investing in a quality multimeter has been a game-changer—I can now accurately test voltage levels and detect subtle wiring faults that usually go unnoticed. A thermal camera is another underrated tool I use to spot overheating connections behind walls before they become a fire risk.
What’s everyone’s experience with these tools? Do you think smart meters or thermal imaging will become more affordable for homeowners soon? I’d love to hear how others are integrating tech into their DIY troubleshooting routines. Remember, safety should always come first—never work on live circuits without proper training or equipment. It’s surprising how many issues—like corroded contacts or hidden ground faults—are beyond surface checks, and tackling them early can prevent costly repairs or dangerous incidents.
This post really resonates with me, especially the emphasis on proper troubleshooting. I’ve dealt with flickering lights and occasional charger hiccups myself, and I used to think resetting the breaker was a quick fix—until I learned that frequent trips can signal underlying problems like poor wiring or aging panels. Investing in a good multimeter has truly changed how I approach electrical issues; I can now troubleshoot with more confidence and safety. I recently even bought a thermal camera, which has helped me identify hidden hotspots behind walls, preventing potential fire hazards. It’s so reassuring to have these tools, but I wonder—do you think DIY enthusiasts will see more affordable, user-friendly smart meters and thermal imaging devices in the future? I believe technology will make home troubleshooting safer and more accessible. Does anyone have tips on how to integrate these tools effectively into regular home maintenance? Safety first, always—never work live circuits without proper training or equipment.