
You hear it before you see the steam. That low-frequency grind, a rhythmic screech that sounds like a banshee in a blender. Most homeowners ignore it until the smell starts—the unmistakable scent of ozone and charring dust. That’s the smell of a shaded-pole motor surrendering to physics. My old journeyman used to smack my hand with a pair of dikes if I ever tried to strip a wire with a pocketknife. ‘You nick that copper, kid, and you’ve just created a hot spot that’ll burn this place down before the drywall is even taped,’ he’d bark. He was right, and that same obsessive attention to detail is why you don’t always need to rip your ceiling apart to fix a dead fan. We’re going to perform a forensic autopsy on your ventilation system and swap the guts without touching the housing.
The Anatomy of a Bathroom Burnout
When a bathroom fan fails, it’s rarely the housing or the ductwork. It’s the motor. Specifically, the sleeve bearings have likely turned their lubricant into a sticky varnish. Most of these units use shaded-pole induction motors. They are simple, but they are inefficient. They convert a massive amount of energy into heat rather than torque. When the ‘squirrel cage’ blower becomes clogged with a decade of hairspray and skin cells, the motor has to work harder. This increases the amperage draw. Heat builds up in the stator windings until the thermal overload protection—a tiny components buried in the coils—finally snaps. This is often where code violation corrections begin, especially in older homes where these fans were never properly grounded.
“Mechanical ventilation shall be provided in accordance with the requirements of the International Residential Code.” – NEC Section 406.12
If you are living in a home built between 1900 and 1950, your challenges are compounded by the presence of old infrastructure. I’ve been called out for storm damage electrical repair only to find that a bathroom fan was actually the culprit, having arced out because it was tied into ancient, brittle wires. If you still have knob and tube removal on your to-do list, be extremely careful. That insulation crumbles the moment you touch it, leaving live copper exposed against the metal fan housing. In these cases, a simple motor swap might reveal you need insurance claim electrical work or a complete circuit overhaul.
The Forensic Breakdown: Why It Failed
Before you buy a replacement, you need to understand why the old one died. Pull the grille off and look at the motor plate. If you see black soot, you’ve had an electrical arc. If the motor is seized, it’s a mechanical failure of the bearings. We use a Tick Tracer to ensure the power is dead at the switch, but don’t trust it blindly. I always pull out my Wiggy (solenoid voltmeter) to verify there’s no phantom voltage lingering on the line. I’ve seen enough ‘widow makers’ in my 35 years to know that a non-contact tester is just a suggestion, not a fact.
In modern ADU electrical services, we see a lot of high-end fans with integrated LED arrays. But in most mid-century guts, it’s just a motor mounted to a bracket with two nuts. The failure is usually ‘Cold Creep’ related if the connections were aluminum, but in bathroom fans, it’s almost always environmental. Moisture from the shower enters the motor housing, reacts with the dust, and creates a conductive sludge. If your fan isn’t on a GFCI-protected circuit, you’re essentially running a potential short-circuit right over your head while you’re in the tub.
[IMAGE_PLACEHOLDER]
Step-by-Step: The Guts Swap
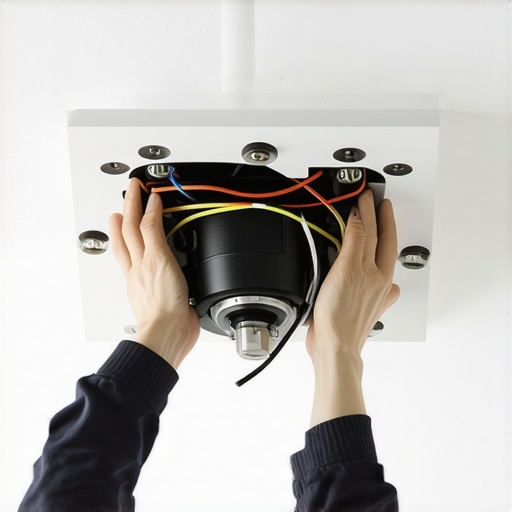
First, kill the breaker. Don’t just flip the wall switch; someone could walk in and flip it back on while your fingers are in the box. Unplug the motor from the internal receptacle. Most fans have a motor plate held in by a single screw or a spring clip. Pop the plate out. This is the ‘Rough-in’ phase of your repair. Now, look at the motor itself. It’s likely held to the bracket by two long bolts that run through the motor laminations. Use your dikes to cut any zip ties holding the wires. Swap the old motor for the new one, ensuring the shaft is centered. If the shaft is too long, you’ll have to cut it—but if you bought the right OEM replacement, it should be a drop-in fit. When you’re re-installing, check the wiring. If the wires feel stiff or ‘crunchy,’ you’re looking at heat damage. This is a common issue we address during how electricians tackle troubleshooting for lighting installations, where heat from bulbs degrades the conductor insulation over decades.
The Hidden Dangers of the ‘Handyman Special’
I’ve seen flippers try to save money by financing electrical upgrades through cheap labor, leading to bathroom fans vented directly into the attic. That’s a recipe for mold and fire. The fan must vent to the exterior. While you have the motor out, stick a vacuum hose up into the duct. If you find a bird’s nest or a wall of lint, that backpressure is what killed your motor in the first place. This is the same logic we apply to ceiling fan installation—if the physical resistance is too high, the motor will burn out prematurely. If you’re working on a larger project, like network cable installation or landscape lighting install, always ensure your bathroom circuits aren’t being overloaded by these ‘extra’ loads. A 20-amp bathroom circuit should be dedicated to the bathroom only.
“Aluminum wire connections can overheat and cause a fire without tripping the circuit breaker.” – CPSC Safety Alert 516
If you discover that your bathroom fan is wired with old aluminum branch circuits, you need to use AlumiConn connectors or a similar CO/ALR rated device. Don’t just twist a copper motor lead onto an aluminum wire with a standard wire nut. The galvanic reaction will oxidize the junction, create resistance, and you’ll be smelling that ozone again in six months. This is why lighting installations made easy is often a misnomer; the physics of the connection are what matter, not just the ‘Trim-out’ appearance.
Modern Upgrades and Energy Considerations
Today, we look at energy storage systems and smart homes. You can now get replacement motors that are DC-powered and use 70% less electricity. If you’re going through the trouble of a motor swap, consider a high-efficiency unit. It’s quieter and runs cooler. For those considering an ev charger troubleshooting or a home home run to the panel for new equipment, remember that every small load counts. While a bathroom fan doesn’t pull much, a seized motor can pull four times its rated current before the breaker trips, especially if you have an old Federal Pacific or Zinsco panel that refuses to trip. For more on keeping your systems running, check out top ev charger maintenance tips for optimal performance or read about ensuring safe and efficient ev charging station setup at home to see how modern standards have evolved. If you find your panel is a relic of the past, contact us for a forensic evaluation of your home’s safety.
Final Inspection
Once the new motor is in, the squirrel cage is cleaned, and the bracket is snapped back into the housing, restore power. It should hum quietly. If it vibrates, the blower wheel is out of balance. If it smells like hot metal, the bearings are tight. A properly installed motor in a clean housing should last another 15 to 20 years. Don’t be the guy who ignores the warning signs. Electricity doesn’t give many second chances, and a bathroom fan is a prime candidate for a silent house fire. Take the time to torque your screws, check your grounds, and sleep better knowing your home’s ‘lungs’ are clear and safe. “