The Autopsy of a Charred Circuit
You smell it before you see it. It is not just the stench of burnt wood; it is the chemical, acrid bite of vaporized PVC insulation and the ozone of a dying transformer. As a forensic inspector, I have walked through hundreds of homes where the drywall was stripped back to reveal the black, skeletal remains of what used to be a family’s life. When you are dealing with fire damage wiring restoration, the damage isn’t just where the flames touched. It is in the microscopic degradation of the copper, the soot-clogged bus bars, and the carbon-tracking across every outlet. My old journeyman used to smack my hand if I stripped a wire with a knife. ‘You nick the copper, you create a hot spot,’ he’d scream. He was right then, and that principle is 100 times more lethal when a house has survived a thermal event. A single nick, combined with the heat of a fire, creates a point of high resistance that will inevitably lead to a second disaster if you don’t gut the system properly.
“Electrical systems that have been submerged or exposed to high heat must be evaluated by a qualified person before being energized. Most of these components are not designed to be reconditioned.” – NFPA 70E Standard for Electrical Safety
The Forensic Breakdown: Why Insulation Fails Under Stress
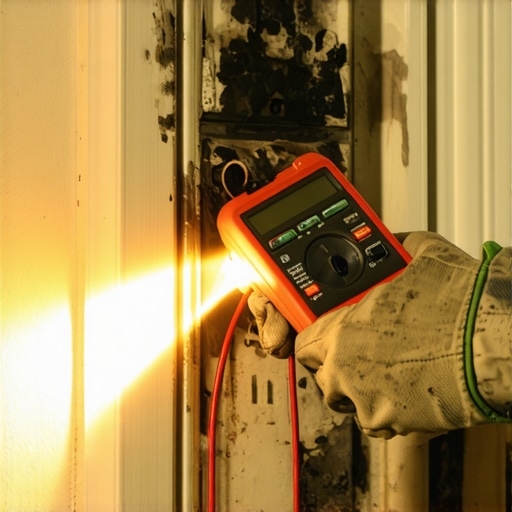
Electricity is lazy and aggressive. It wants to find the shortest path to ground, and it will wait for the heat to weaken your insulation to do it. During a fire, the temperature in the wall cavities can reach levels that cause the plasticizers in Romex insulation to leach out. Once those chemicals are gone, the insulation becomes brittle like an old potato chip. You might not see it during a quick walkthrough, but the moment you try to pull a new home run through those studs, the insulation cracks, and you have a ticking time bomb hidden behind your brand-new paint job. This is why a power quality analysis is non-negotiable after any significant fire. We aren’t just checking if the lights turn on; we are measuring the insulation resistance (megging the wires) to see if the leakage current is enough to start another arc. If you are troubleshooting-for-lighting-installations in a fire-damaged room, don’t trust a tick tracer. Those non-contact testers can give false negatives when carbon soot is coating the walls, creating a conductive path that masks the true voltage. Use a Wiggy or a true RMS multimeter to get the real story.
The Meter Base and Service Entrance: The Gateway to Safety
Often, the fire department has to yank the meter to kill the power to the structure. By the time I get there, the meter base replacement is usually the first item on the checklist. Fire heat travels through the service entrance conductors like a highway. If the exterior of your home was scorched, the internal lugs in that meter can have lost their spring tension. In the electrical trade, we call this thermal fatigue. Once those lugs lose their bite, you get a loose connection. A loose connection creates heat. Heat creates resistance. Resistance creates more heat. It’s a feedback loop that ends with a molten mess of copper and a widow maker scenario. If we are doing a full fire damage wiring restoration, we are likely looking at a smart meter installation and a total meter base replacement to ensure the utility side of the house is as solid as the day it was built. This is also the time to consider three phase power services if the property is large enough to warrant it, though most residential recoveries will stick to 240V split-phase.
Modernizing During the Recovery: Future-Proofing the Build
If you are already tearing out the charred remains of your living room, it is the perfect time to stop thinking about 1970s standards and start looking at microgrid integration. Modern homes are no longer just passive consumers of power; between solar arrays and battery backups, we are building mini-power plants. Part of the recovery checklist should include ensuring-safe-and-efficient-ev-charging-station-setup-at-home. If we are running new Romex for the garage, we are running 6/3 for that Level 2 charger now, not later. We also look at the comfort and security of the home. This means whole house fan wiring to improve air quality post-remediation and security camera wiring while the walls are open. It is much cheaper to run Cat6 and 14/2 for cameras during the rough-in phase than it is to fish it through later. Even pathway lighting install and patio cover outlets should be planned now. If the fire damaged your exterior siding, we can integrate these features into the new exterior envelope with proper monkey shit (duct seal) around the penetrations to keep moisture and pests out of your new, clean service.
“Aluminum wire connections can overheat and cause a fire without tripping the circuit breaker.” – CPSC Safety Alert 516
The Invisible Threat: Carbon Tracking and Soot
Soot is not just dirt; it is carbon. Carbon is conductive. When a fire occurs, soot gets inside your breaker panel and coats the bus bars. Even if the fire didn’t melt the breakers, that soot can create a bridge between the phases or to ground. This is how you get phantom trips and mysterious voltage drops. During a fire damage wiring restoration, if the panel was exposed to heavy smoke, I don’t clean it—I replace it. The risk of the phenolic resins in the breaker casings being compromised is too high. We also need to be wary of ev-charger-troubleshooting-expert-tips-to-fix-common-issues that arise from poor power quality post-fire. If your charger is throwing ground fault errors, it might not be the charger; it might be the carbon-tracked home run we missed in the attic. This is where the trim-out becomes critical. Every outlet and switch must be new. Re-using a $0.50 outlet that has been through a 400-degree heat cycle is the height of stupidity.
The Master Electrician’s Safety Checklist
- Phase 1: Stabilization – Have the utility company pull the meter. Use a Wiggy to verify the house is truly dead before touching anything.
- Phase 2: Forensic Stripping – Remove all drywall in the affected zones. If a wire was within 3 feet of active flame, it’s garbage. Cut it out with your dikes and don’t look back.
- Phase 3: Service Upgrade – Inspect the mast and weather head. Perform meter base replacement and install a new panel with AFCI (Arc-Fault Circuit Interrupter) breakers. They are the only thing that will catch a carbon-track fault.
- Phase 4: The New Grid – Plan for microgrid integration. Run the conduits for solar and battery storage while the studs are bare.
- Phase 5: Sub-System Installs – This includes security camera wiring, whole house fan wiring, and patio cover outlets.
- Phase 6: Final Testing – Before the first light switch is flipped, a full power quality analysis must be performed. If the impedance isn’t perfect, the job isn’t done.
Conclusion: Sleep at Night, Don’t Just ‘Fix’ It
Recovering from a fire is an emotional grind, but you cannot let that fatigue lead to shortcuts in the electrical system. You can’t see electricity, and you can’t see the damage it does to copper at a molecular level until it’s too late. Whether you are top-ev-charger-maintenance-tips-for-optimal-performance or just trying to get the kitchen lights back on, the standard is the same: Code is the minimum, safety is the goal. Torque every lug to the manufacturer’s specs. Use the monkey shit to seal the holes. Don’t nick the wire. If you do it right, the only smell in your house will be new paint, not the ghost of a fire waiting to happen again.