
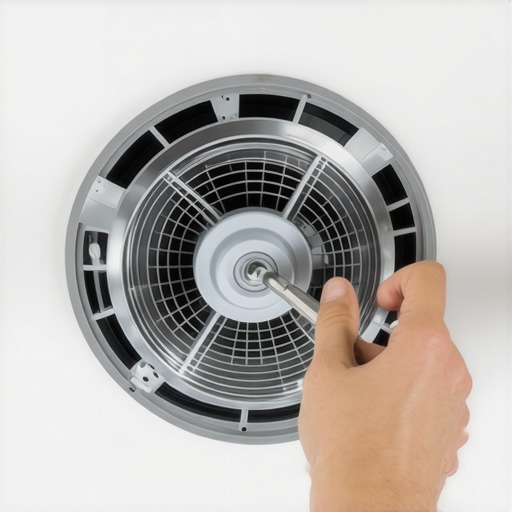
The Death Rattle of a Ceiling Scrubber: The Autopsy of a Humming Bathroom Fan
That low, guttural buzz vibrating through your drywall isn’t just an annoyance—it’s the sound of a mechanical failure evolving into a thermal event. When you flip that switch and hear a hum instead of the rush of air, you aren’t just dealing with a broken fan; you’re witnessing a battle of physics where electricity is trying to force a seized motor to turn, and the byproduct is heat. In thirty-five years of residential forensics, I’ve seen these ‘humming’ fans melt their plastic housings and drip liquid fire onto a bath mat. If the motor isn’t spinning, it’s just a toaster oven mounted in your ceiling. Before you ignore it, understand that a humming motor is drawing ‘Locked Rotor Amps’ (LRA), which can be five to six times the normal operating current.
My old journeyman used to hit me with his gloves if I ever ignored a motor that talked back without moving. ‘If it’s humming, it’s cooking,’ he’d growl while we pulled a scorched unit out of a 1940s craftsman. He taught me that the lacquer on those copper windings—thin as a gnat’s wing—bubbles and cracks under that heat. Once the insulation fails, you’ve got a direct short. This is why regular electrical inspections are non-negotiable. It’s not just about the big stuff like swimming pool bonding; it’s about the small motor in the ceiling that runs for forty minutes while you’re at work because you forgot to flip the switch.
“If a motor is stalled in the energized position, the temperature of the windings will rise rapidly, which may result in a fire if the motor is not protected by an integral thermal protector or a properly sized circuit breaker.” – NFPA 70: National Electrical Code (NEC)
The Forensic Breakdown: Why the Hum Happens
To understand the hum, you have to understand the shaded-pole motor typical in these units. These are dirt-cheap, low-torque induction motors. They rely on a ‘shading coil’ to create a tiny phase shift in the magnetic field to get the rotor moving. When that rotor is jammed by pet dander, aerosol hairspray, or a seized sleeve bearing, the magnetic field just vibrates the rotor back and forth at 60 Hertz. That’s the hum. It is literally the sound of the 120-volt AC cycle trying to shake the motor into life. In older homes where moisture has lived in the attic for decades, these motors undergo ‘Cold Creep’ in their mounting hardware and the bearings lose their lubrication, becoming a solid mass of oxidation.
Step 1: The Sensory Check and Safe Disassembly
Before you reach for your dikes or a screwdriver, shut off the breaker. Don’t just trust the wall switch; I’ve seen enough ‘handyman’ wiring where the neutral was switched instead of the hot, leaving the motor energized even when ‘off.’ Use a Tick Tracer or a Wiggy (solenoid voltmeter) to verify the circuit is dead at the fan housing. Pull the plastic grille down—usually held by two torsion springs—and look for the ‘fishy’ smell. That scent is the chemical signature of burning phenolic resin and overheated wire insulation. If you see black soot on the motor plate, the autopsy is over; you need a replacement from a professional lighting installation services provider.
Step 2: Testing the Mechanical Resistance
With the power off, try to spin the fan blade with your finger. It should spin freely for several rotations. If it stops instantly or feels like it’s stuck in ‘monkey shit’ (duct seal), the bearings are shot. In many cases, the high humidity of a bathroom causes the shaft to rust into the sleeve bearing. This is especially common in coastal regions where salt air bridges the gaps between metallic components, accelerating galvanic reaction. While you might be tempted to spray some WD-40 in there, don’t. That’s a temporary fix that creates a sticky dust-magnet, leading to a secondary failure within months. We aren’t doing a ‘flipper special’ here; we’re doing a permanent repair.
Step 3: Voltage Verification and AI Fault Detection
Sometimes the hum isn’t the motor’s fault; it’s a ‘brownout’ condition at the fixture. If you have a loose neutral at the home run in the panel or a corroded wire nut in a junction box, the motor might only be receiving 90 volts. It doesn’t have the torque to start, so it just sits there and vibrates. This is where remote electrical diagnostics or AI fault detection tools are becoming invaluable in modern kits, identifying micro-arcs that a standard multimeter might miss. If you’re seeing 120V at the leads but the motor just groans, the start-winding is likely toast. This is a common issue we see when homeowners try to DIY their track lighting services or patio cover outlets and end up overloading a branch circuit.
“Aluminum wire connections can overheat and cause a fire without tripping the circuit breaker, particularly in high-moisture areas like bathrooms.” – CPSC Safety Alert 516
Step 4: The Code-Compliant Solution
If the motor is seized, you have two choices: replace the motor or replace the entire housing. If the housing is an old 1970s NuTone, you likely won’t find a direct motor match. Tearing out the housing means going into the attic. This is where you need to ensure OSHA compliance wiring standards are met—no flying splices in the insulation. Every connection must be in a listed junction box. If you’re already digging around in the ceiling, it’s the perfect time to look at lighting installations made easy by upgrading to a modern, quiet DC-motor fan that draws 70% less power and won’t hum even if it gets dusty. You can find more about these upgrades through lighting installations made easy.
Why You Shouldn’t Just ‘Live With It’
I’ve walked into too many houses for electrical inspections where the homeowner says, ‘Oh, that fan has been humming for years.’ Then I show them the charred Romex inside the ceiling joist. Electricity is a lazy, destructive force that always wants to return to its source, and it will burn your house down to find the shortest path. Whether you are dealing with driveway sensor lights, PA system installation, or a simple bathroom vent, the principles of resistance and heat remain the same. If a device is drawing current but not performing work, it is producing heat. Period. If you aren’t comfortable checking the rough-in or performing a trim-out on a new unit, it is time to contact us for a professional diagnostic. For more technical insights on how we handle these issues, check out how electricians tackle troubleshooting. It’s better to spend a few hundred bucks on a proper installation than to pay a five-thousand-dollar insurance deductible because you let a ‘hum’ turn into a bonfire.